This is a user manual for an example project.
Introduction
This project does something. We just haven’t decided what that is yet.
This page was built by the following command:
$ ./gradlew asciidoctor
Diagrams
You can make diagrams in Asciidoctor
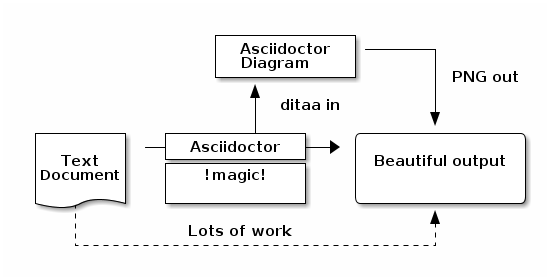
For example, the following:
Basic ditaa block
[ditaa]
....
                   +-------------+
                   | Asciidoctor |-------+
                   |   diagram   |       |
                   +-------------+       | PNG out
                       ^                 |
                       | ditaa in        |
                       |                 v
 +--------+   +--------+----+    /---------------\
 |        | --+ Asciidoctor +--> |               |
 |  Text  |   +-------------+    |   Beautiful   |
 |Document|   |   !magic!   |    |    Output     |
 |     {d}|   |             |    |               |
 +---+----+   +-------------+    \---------------/
     :                                   ^
     |          Lots of work             |
     +-----------------------------------+
....
produces

Figure 1. Basic ditaa block output
build.gradle
plugins {
        id 'org.asciidoctor.convert' version '1.5.3'
        id 'com.github.jruby-gradle.base' version '1.2.1'
}

apply plugin: 'java'
apply plugin: 'org.asciidoctor.convert'

version = '1.0.0-SNAPSHOT'

dependencies {
        gems 'rubygems:asciidoctor-diagram:1.4.0'
}

asciidoctorj {
    version = '1.5.4'
}

asciidoctor {
        dependsOn jrubyPrepare
        requires = ['asciidoctor-diagram']
        gemPath = jrubyPrepare.outputDir

        attributes        'build-gradle': file('build.gradle'),

                                'source-highlighter' : 'coderay',
                                'imagesdir':'images',
                                'toc':'left',
                                'icons': 'font',
                                'setanchors':'true',
                                'idprefix':'',
                                'idseparator':'-',
                                'docinfo1':'true'
}